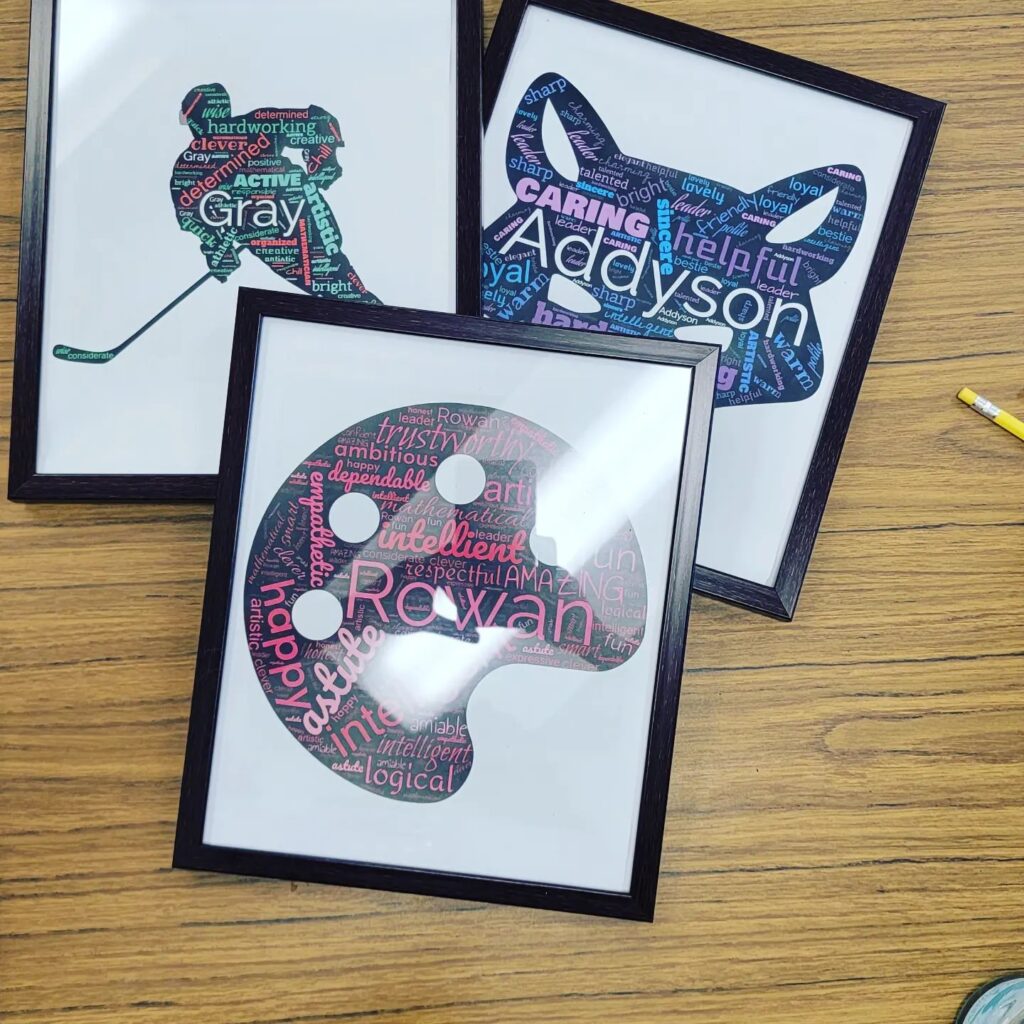
It’s so nice when you can give something that students will remember and keep for a long time. For some it means everything!
When I first started teaching I knew I wanted to get my students something. When I taught primary gifts were relatively easy. For the most part food, cute freezie holders, or something they would use immediately was just perfect. However, when I moved to junior that all changed. I really struggled with what I could do that they weren’t going to:
A) Eat immediately (freezies, candies)
B) Throw away
C) Use as some sort of weapon
I knew I wanted something that I could do with them that would mean something, and if I’m being honest, for a lot of them their friend’s opinions mean more than mine. That’s when I started the ‘Just One Word’ Activity. Let me give you some instructions on how this works for grades 4 and up. Anything below that I would say you likely want another kind of gift as this will not be as meaningful.
- Print out my printable ‘Just One Word’ page (after you edit it to include the names of your students.
- Allow about 100 minutes for this if not more. Take the time to go over with your students what kind of words they should use. I tell them they can’t describe someone’s looks (even with the word beautiful) because we want to focus on character. I do this to encourage them to look deeper. Plus after doing this once with grade 7’s I had a student describe every single peer as ‘beautiful.’ That’s not helpful and not as meaningful to people.
- Next, we go over how to turn negatives into positives. Is that student really loud? Maybe they are vocal or verbal. Is that student bossy? Maybe they show leadership (can only use the word leadership – one word not a phrase).
- Then we look at either physical thesaurus’ or digital ones.
- After students have finished (sometimes this takes a couple of days), I tell them to write their name at the top left as well as their favourite two colours, favourite activity or favourite animal. Then they hand them in to me. The idea is that they don’t see what other people put because that takes away the surprise later.
- When all is done I put all the papers in the stack and create the word art at this link

This is the toolbar you will see and I found it fairly user-friendly but let me walk you through how to use it quickly.
- To add words click on ‘Word List’ and ‘edit.’
- In the toolbar, you will see the words ‘Auto fit’ as well as ‘Repeat Words.’ Make sure you toggle those so they turn blue as it will look much better!
- To change the shape click on…..’ shape.’
- To add a variety of fonts click on ‘fonts’ and then ‘add fonts’ This gives you a variety, which in my experience looks more pleasing to the eye.
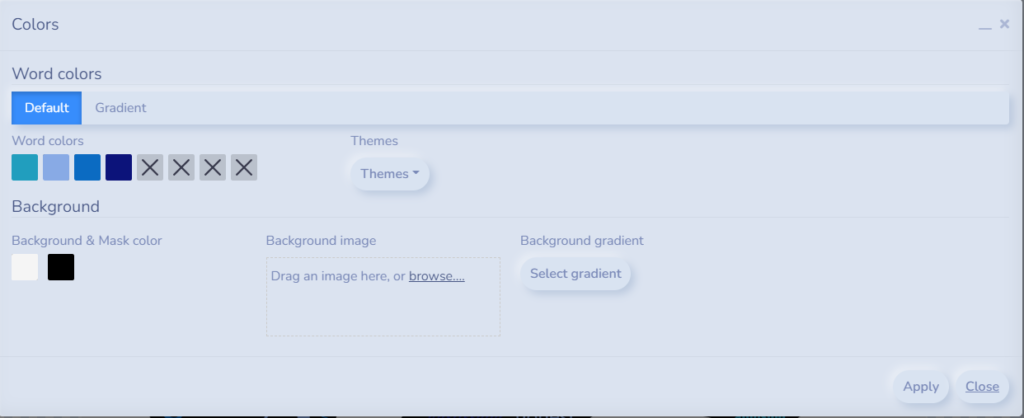
- If you want to customize the colours (I did) you will want to click on ‘colours’. The background is the white space in my word art. The black portion is called the mask. When you click on colours you will see the below menu. Just play with colours until you get what I want. I used their favourite colours here as well as their favourite activities to customize the shape and colour. To me, it makes it more special, however, if you are in a time crunch make all words black and change your mask to a lighter grey and your background to white. I’ve done this before.

After you are SURE you are finished press CTRL and S at the same time. You can save under ‘File,’ however, I didn’t. If you are hesitant with the word clouds I would recommend this. I actually ended up regretting my decision not to save as there were a couple I didn’t like and needed to fix. I had to redo them. When you press CTRL S it will ask you if you want to save it as a pdf or an image. Save each as a pdf and give it the name of your student. I put all of them in a folder right on the desktop that I’ll delete later. Make sure you choose ‘letter’ size as below.

I then uploaded all the files to Staples Copy and Print Centre. They were printed and ready when I was done school the next day and I picked them up at the same time I stopped at Dollar Tree to get frames. Were they the best frames…no? Will they work and look really awesome for the kids – yes they will! In the past, I’ve also laminated them but I’ve found they aren’t as special to the kids then. Getting things in a finished frame just makes it all the better! Before I hand things out there is one last step. I won’t put a picture because those notes are personal but in a metallic marker, I write my own version of this. Something along the lines of ‘Kayla this year it’s been great watching you mature. Your kindness, empathy, and responsibility are something that makes you a great student in any class.’ I personalize this to every student and it really takes me about 40 minutes.
Some years I then put them in bags or wrap them. However this year I just started setting them up on my chalkboard ledge. The reaction from kids is always the best. Kids that didn’t know that people saw them as generous or kind or smart always want to know who put that for them. I had one girl that very seriously asked “Mrs. Sparling did you write this because I don’t believe people said these nice things.” Knowing that they now feel like everyone has a kind word for them is a perfect way to end the year. It’s enough to bring a tear to your eye. In addition, the goodwill and kind thoughts from parents from these are just priceless.
If you try these please send your pictures of your finished products to: sheri@mrssroom.com. I love to see ideas from other classes!